Hướng dẫn sử dụng Microservice, Eureka và Zuul Gateway - Phần 3
Trong phần này chúng ta sẽ cùng tìm hiểu về Spring Cloud Configuaration.
Spring Cloud Configuration là một module trong hệ sinh thái Spring Cloud, cung cấp các công cụ để xây dựng các hệ thống phân tán và ứng dụng dịch vụ nhỏ. Spring Cloud Configuration tập trung cụ thể vào việc quản lý cấu hình của các ứng dụng trong một cách tập trung và linh hoạt.
1. Spring Cloud Config Serve
Đầu tiên chúng ta cần tạo 1 git repo để lưu trữ file config
Mục đích của việc này là để gom các hết tất cả các config trong hệ thống microservice lại 1 chỗ để dễ ràng cho việc quản lý và update
chúng ta sẽ tạo config cho 2 service Auth và Zuul như sau:
auth-service.yml
security:
  jwt:
    uri: /auth/**
    header: Authorization
    prefix: Bearer
    expiration: 86400
    secret: JwtSecretKey
Tương tự như vậy với zuul-server.yml
security:
  jwt:
    uri: /auth/**
    header: Authorization
    prefix: Bearer
    expiration: 86400
    secret: JwtSecretKey
Ở đây chúng ta cần lưu ý việc đặt tên file phải trùng với tên của service tương ứng với giá trị
spring.application.nametrong file application.yml việc đặt tên trùng để giúp cho Spring mapping đúng config cho từng service
Bước tiếp theo cần tạo project config-server sử dụng dependency như sau:
<dependency>
    <groupId>org.springframework.cloud</groupId>
    <artifactId>spring-cloud-config-server</artifactId>
</dependency>
Trong class main application sử dụng anotation @EnableConfigServer để khai báo đây là config server
@SpringBootApplication
@EnableConfigServer
public class ConfigServiceApplication {

    public static void main(String[] args) {
        SpringApplication.run(ConfigServiceApplication.class, args);
    }

}
Ở trong file application.yml như sau:
server:
  port: 8888
spring:
  application:
    name: config-service
  cloud:
    config:
      server:
        git:
          uri: https://github.com/cuongvndev/config-files.git
          clone-on-start: true
        #   username: xxxx
        #   password: xxxx
Ở đây mình sẽ lưu config tại git repo. Hãy thêm username và password nếu cần khi bị lỗi authorize
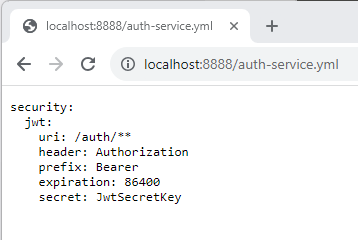
Bây giờ chúng ta truy cập vào đường dẫn http://localhost:8888/auth-service.yml thì sẽ thấy kết quả như hình:

2. Config Client
Tiếp theo ở Auth service và Zuul Server gateway sẽ lấy thông tin config thông qua config server.
Thêm dependency config-client ở Auth service và Zuul Server:
<dependency>
    <groupId>org.springframework.cloud</groupId>
    <artifactId>spring-cloud-starter-config</artifactId>
</dependency>
- AuthServiceApplication
@SpringBootApplication
@EnableEurekaClient
@RefreshScope
public class AuthServiceApplication {
    public static void main(String[] args) {
        SpringApplication.run(AuthServiceApplication.class, args);
    }
}
- ZuulServerApplication
@SpringBootApplication
@EnableZuulProxy
@EnableEurekaClient
public class ZuulServerApplication {
    public static void main(String[] args) {
        SpringApplication.run(ZuulServerApplication.class, args);
    }
}
Sử dụng @RefreshScope trên một Spring Bean, bạn đang yêu cầu Spring Boot làm mới (refresh) lại bean đó khi có sự thay đổi cấu hình được áp dụng (thông qua cơ chế “Refresh Scope”). Điều này cho phép bạn cập nhật các giá trị cấu hình mà bean sử dụng mà không cần khởi động lại ứng dụng.
Thêm Spring cloud config uri trong Auth và Zuul server:
- Auth-service
server:
  port: 8082

eureka:
  client:
    service-url:
      defaultZone: http://localhost:8761/eureka

spring:
  application:
    name: auth-service
  cloud:
    config:
      uri: http://localhost:8888
- Zuul-server
server:
  port: 8080

zuul:
  routes:
    user-service:
      path: /user/**
      service-id: user-service
    product-service:
      path: /product/**
      service-id: product-service
    auth-service:
      path: /auth/**
      service-id: auth-service
      strip-prefix: false
      sensitive-headers: Cookie,Set-Cookie

spring:
  application:
    name: zuul-server
  cloud:
    config:
      uri: http://localhost:8888

eureka:
  client:
    serviceUrl:
      defaultZone: http://localhost:8761/eureka/
    register-with-eureka: true
    fetch-registry: true
  instance:
    prefer-ip-address: true
Việc config cho các service đã xong tiếp theo hãy chạy Auth và Zuul Server lên để testing nhé!